DIYbeginners

Author name: Raza

Raza is the founder of DIYbeginners. At 24, he built this site to help complete beginners tackle home improvement without expensive professionals or confusing guides. He writes about building, repairing, and buying the right tools — always from a beginner's perspective, always without jargon. Any Questions? Contact!

Explore Projects

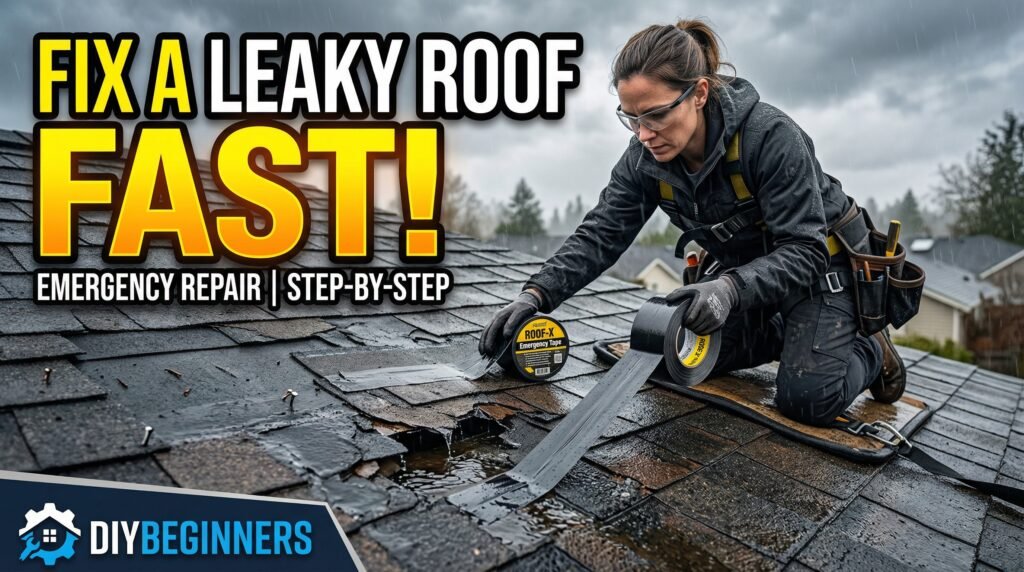
How to Fix a Leaky Roof (Emergency Patch + 4 Permanent Fixes for Beginners)

The most panic-inducing home repair is the roof leak, and it’s easy to see why. A roof leak equates to damage occurring right now, and the possible areas affected are the ceiling, insulation, drywall, and wood beneath the leak.What I’ve learned about the situation is that the vast majority of roof leaks are the result of simple, localized problems. This means the roof leak isn’t necessarily the result of the entire roof, but rather the result of a problem in one specific area on the roof. Many of these problems are completely fixable by anyone with the right materials and the right mindset, even if they’re a beginner. There are two sections to this guide: one on what to do immediately to stop water entering through the roof (the emergency patch), and another on how to locate and repair permanently the four most common causes of roof leaks. I’ll also let you know when a roof leak is too tricky for a beginner and needs to be done by a professional roof repairer.Safety note: Before we begin, here’s an important note on roof safety: every precautionary note in this roof repair manual is there for a reason. Please read the section on roof safety before attempting to go on your roof. Roof Safety — Read This First Working on a roof can be genuinely dangerous. Falling off a roof can result in thousands of serious injuries and deaths annually in the US, and this includes experienced roofers and contractors. This is not a section to skim.⚠️ Safety Warning: Don’t ever go on a roof if it’s wet, icy, or frosty. The roof will be slippery enough to cause a fall, even if the roof has a low pitch. Wait for dry weather. The roof will be there tomorrow, but your safety isn’t. ⦁ Only work on roofs with a pitch where you can walk comfortably. If the roof is steep enough where you have to hold on with both hands to walk on the roof, it’s too steep for the average DIYer. Call a professional.⦁ Use an extension ladder. Make sure it’s properly positioned (1 foot out for every 4 feet of rise), locked in place, and extend it at least 3 feet above the roof’s edge.⦁ Wear rubber-soled shoes. Running shoes or work boots with rubber soles will grip the roof much better than smooth-soled shoes.⦁ Never work on the roof by yourself. Make sure someone on the ground knows where you are and can call for help if necessary.⦁ Avoid the roof entirely if there are high winds. Even moderate winds make it much more hazardous to fall on the roof.⦁ Use a roof safety harness. They are available for purchase at Home Depot for between $40 and $60. They are worth every dollar for any roof with a steeper pitch than 6:12. 🔑 Key Insight: Most roof repairs that beginners can do can be accomplished without ever stepping foot on the roof by using ladders. If the leak is in an area of the roof that is close to the peak of the roof or is a steep area of the roof, it is best left to a licensed roofer. No roof repair is worth risking your life. Step 1: Emergency — Stop the Water Coming In Right Now However, if it is actively raining and water is entering your home currently, the priority is to prevent further damage inside the home until the time it is safe to handle the roof. Do not venture on the roof if it is wet.Inside the House — Protect Your Belongings ⚠️ Safety Warning: If the ceiling is significantly sagging or bowing under the weight of the water, leave that room and do not re-enter the room until the water drains out. This is because a water-logged ceiling can fall at any time, and falling plaster or drywall can cause serious injury. Emergency Roof Tarp — When Safe to Do So Once the rain has stopped and the roof is dry enough to walk on without damaging it further, the emergency tarp can be used to wait until a more permanent solution can be implemented. 💡 Pro Tip: In some cases, a tarp can last for weeks if put in correctly. This can give you time to have a professional assessment done, time to collect materials, and/or time for better weather to arrive. The important thing is to make sure it is secure. A flapping tarp does more harm than good. Step 2: Find the Source of the Leak The most important, yet most difficult, part of fixing a roof leak is to find where the leak is really occurring. Water will enter the roof in one place, but travel down the rafters before falling down through the ceiling in another place. The place where water falls down through the ceiling is rarely directly below where it entered the roof.Start From Inside the AtticOn a dry day, enter your attic with a flashlight. Look for water stains, or even daylight coming through the roof deck. Water stains on the rafters or roof deck will indicate where water is entering. Look up the roof in that place to find where water is really coming in. Water stains will run down the roof. The place where water is really coming in will have the water stain highest up. The Garden Hose TestIn the event the location of the leak is not visible inside, the garden hose test should be conducted on a dry day. One should remain inside the attic, calling out when he or she sees water. The second person should soak the roof with the garden hose, working his or her way up the roof. Each area should be soaked for 2 or 3 minutes before moving on to the next area. If the person inside the attic sees water, the location has been found. Common Leak Sources to Check First⦁ Flashing – The flashing on chimneys, skylights, and

Explore Projects

How to Stop a Toilet from Running (and Why It Matters for Your Water Bill)

There are two different types of running toilets. The first type is the one that you can hear, and that is usually a steady hiss or a slow trickle that you will always become aware of when the rest of the house is quiet. The second type is the type that you don’t even hear, a slow leak that only becomes apparent when you get your water bill and see a number that is just too large for no apparent reason. Either way, you are wasting the same thing: money. A toilet that has a slow leak in the flapper that you don’t even hear can waste over 200 gallons a day. A fast-running toilet will waste 4,000 gallons a day. The fix is almost always one of these three things: the flapper is worn out, the float is installed too high, or the fill valve is malfunctioning. All of these are easy repairs that any beginner can do. All of these repairs are under $15 to fix. None of these repairs require the assistance of a plumber. The hardest part of this job is figuring out which of these problems you are dealing with, and this article will walk you through that process.Note: This article is meant to be read in conjunction with our original article on fixing a running toilet, which goes through the entire step-by-step process of fixing these different parts of the toilet. The Real Cost of a Running Toilet While most people understand that running toilets are inefficient, the actual figures are shocking enough to warrant the repair as a necessity rather than a luxury.⦁ Slow silent flapper leak: 30 to 200 gallons daily.⦁ Moderate running toilet: 200 to 1,000 gallons daily.⦁ Fast running toilet (audible hiss): up to 4,000 gallons daily.⦁ Actual Cost: $0.005 per gallon average cost for water in the United States; $55 to $365 per year for one toilet for the silent flapper leak.⦁ Actual Cost: $365 to $1,825 per year for one toilet for the moderate running toilet.⦁ Actual Cost: Over $7,000 per year for one toilet for the fast running toilet.⦁ Repair Cost: $4 to $15 for parts; 20 minutes of your time. 🔑 Key Insight: The Environmental Protection Agency estimates that household toilet leaks account for almost 1 trillion gallons of wasted water across the nation annually. A great deal of this is because of toilets where the homeowner simply does not know their toilet is running, because of a slow leak. The food coloring test below reveals leaks that are completely inaudible. How to Tell if Your Toilet is Running Silently If you can hear it running, it’s clear what’s going on. But many toilets don’t make a sound. The flapper is leaking slowly enough so you can’t hear the water running into the bowl, but fast enough so it wastes hundreds of gallons per day.The food coloring test will reveal silent running in just 15 minutes, and it’s absolutely free. Understanding the 3 Common Causes The Flapper — Most Common Cause Flapper: This is the rubber that covers the flush valve hole on the bottom of the tank. When you flush the toilet, the flapper will come up to allow water to flow into the bowl. When the tank is refilled, the flapper goes back down, sealing the flush valve hole. A bad flapper will leak water from the tank into the bowl constantly. Flappers usually have a lifespan of 3 to 5 years, until the rubber becomes stiff and warps. Chlorine in the water and tablets that are dropped in the tank will accelerate the deterioration of the flapper. This is by far the most common cause of a running toilet, accounting for 80% of all running toilets. The Float — Quick Free Fix The float works as a signal to the fill valve to stop refilling the tank. If the float is adjusted too high, the water level will be higher than the overflow tube, which is the tall tube in the middle of the tank. The water will drain into the bowl through this tube. You can see this happening if you look at the tank and take off the lid. The water draining into the tube is a dead giveaway.Making this adjustment costs nothing and only takes 30 seconds. The Fill Valve — Least Common The fill valve is the tall device that refills the tank after each flush and closes when water reaches the appropriate level. A bad fill valve doesn’t close properly, continuing to add water to the tank, which overflows and goes down the overflow tube. This is not as common as a bad flapper, but more common than you might think, especially with old toilets. The 3-Step Diagnosis Process Run through these three tests in order. Stop when you find the cause. Test 1: Food Coloring Test (Flapper Leaks) Already explained above.Color appears in the bowl without flushing = Worn Flapper.This test alone accounts for 80% of running toilet problems. Test 2: Overflow Tube Visual (Float Issues) Take off the tank lid and observe the water level as the tank fills up.Water level should stop about 1 inch before the top of the overflow tube.If the level goes up beyond this point and you see water trickling into the overflow tube, your float is too high and you need to adjust it down. Test 3: Float Lift Test (for fill valve failure) As you are filling your tank, you should stick your hand into the toilet and manually hold up the float as if the water level is higher than normal. If the running water is stopped when you manually hold up the float, you should simply adjust the float (free fix). However, if the running water is not stopped even when you manually hold up the float all the way, you should replace your fill valve ($10-$15). 🔑 Key InsightIf you aced the food coloring test, and your results from the visual inspection of the overflow

Explore Projects

How to Fix a Stuck or Jammed Garbage Disposal

Garbage disposals break in very predictable ways, and all of these ways have very simple fixes that take less than 15 minutes to do. The thing is, nobody seems to be aware of the two-step process: diagnosis and then fixing. This leads to pressing buttons and hoping one works.When my garbage disposal broke for the first time, I knew it was broken because it made no sound when I turned the switch. I decided to look up the price for a new one. Then, I was told to check the reset button on the bottom. I did, and voila! It worked perfectly. This could have been a $200 fix for a 10-second problem.There are four types of problems that garbage disposals may have. They include a jammed grinding plate, a reset button, a rattle from a foreign object, and an electrical problem. Three out of four types of problems can be fixed by the user within 15 minutes. One rule that is true for every single fix in this guide, without exception: turn off power to disposal before reaching inside or under it. This is not negotiable. I will remind you of this repeatedly. How a Garbage Disposal Works A garbage disposal is much less complicated than most people think. Essentially, a garbage disposal is an electric motor that is located underneath the sink, which spins a grinding plate, which has impellers, or blunt pieces of metal, attached to them. These impellers fling the food waste against a grinding ring, which does not move, located on the inside of the disposal, grinding the food waste into small pieces that flow down the drain with water.There are no blades, which, for most people, might be the biggest shock of all. The impellers are blunt pieces of metal, not blades, which makes sticking your hand in the disposal a bad idea, as well as why sticking a bone or a fruit pit in the disposal jams the disposal, not chopping them up. 🔑 Key Insight: The one thing you need to understand when it comes to garbage disposal repair is that the motor and grinding plate are totally separate from your plumbing. A jammed garbage disposal does not hurt your plumbing at all. A garbage disposal with a leak coming from the top, around the sink flange, is a plumbing problem. A garbage disposal leaking from the bottom is a seal problem and means it is time to buy a new one. Step 1: Diagnose the Problem Before touching anything, listen and observe. The symptoms tell you exactly which fix to apply. Symptom 1 — Completely Silent When You Flip the Switch No hum, no sound at all. This almost always means that the internal reset button inside the disposal has tripped, cutting off the power supply to the motor.Solution: You have to press the reset button, which is located at the bottom of the unit.This should take about 10 seconds.Sometimes, this may also imply that the switch has failed or that the disposal has lost power supply from the circuit.You should check if other appliances on the same circuit are working. Symptom 2 — Humming Sound but Not Spinning The motor is running, which means it is receiving power, and the grinding plate is stuck because something is jamming it, which could be a hard object, a utensil, or a buildup, causing the grinding plate to seize. This is the most common type of disposal problem, and the fix for this type of disposal problem is to free the grinding plate manually from underneath. Symptom 3 — Loud Rattling or Clanking While Running An object, a hard item such as a cap from a bottle, a spoon, a pit from a fruit, a coin, has fallen into the disposal and is being tossed about inside the grinding chamber. The disposal is still functioning, but the noise is caused by the object being tossed about by the impellers. The object needs to be removed, as it could damage the grinding ring. Symptom 4 — Disposal Works but Drains Very Slowly The disposal is working properly, but the food waste is not going through the disposal, rather backing up in the drain. This is a clog in the drain, which is below the disposal, rather than a problem with the disposal. This is solved by the drain snake or P-trap cleaning. 💡 Pro Tip: Before you start any of this, make sure that the disposal switch is actually connected and works. Try turning the wall switch off and on. Check if it is a switched outlet under the sink by looking for a power button on the disposal unit itself. Some disposal units have a power switch on the unit rather than on the wall. Fix 1: Press the Reset Button (Disposal is Completely Dead) This is the fix that most people don’t know about, and this fixes a large percentage of the ‘my disposal stopped working’ problems right away.Thermal Overload Protector:This is a safety feature that is built into the garbage disposal. This safety feature will turn off the power supply to the disposal’s motor if the disposal is jammed, has been running for a long time, or has received a power surge. This prevents damage to the disposal’s motor. The reset button located on the bottom of the disposal is used to turn the disposal back on after this has happened. 💡 Pro Tip: If the reset button trips again in a matter of minutes after being reset – there is still a jam in the unit. The thermal protector is tripping due to the motor struggling to get around the jam and hence overheating. Fix the jam (Fix 2) before resetting the button. Fix 2: Free a Jammed Grinding Plate (Humming but Not Spinning) A humming disposal is one where the motor is running but the grinding plate won’t turn. The motor will overheat quickly in this state — turn the switch off immediately if this is what you’re

Explore Projects

How to Use a Drain Snake: The Beginner’s Complete Guide

A drain snake is what divides people into those who call a plumber every time there is a clog and those who can take care of such issues on their own. I got mine for about $20, and it has saved me hundreds of dollars ever since, as it has cleared every stubborn clog that the plunger could not handle, every time, for every drain in the home. The first time I used one, I had no idea what I was doing. I stuck the cable into the drain, encountered the clog, pressed harder on the handle, and managed to create a kink in the cable, which took me 10 minutes to untangle. Once I figured out the proper technique, which is more about rotation than force, it is one of the most gratifying tools I own. You can feel the clog, work your way through it, and then water flows freely. A drain snake works by inserting a flexible metal cord into a clogged drain until it hits the clog. It then uses a twisting motion to either twist through or hook into the clog to remove it. The process is simple once you understand what all of the different feelings mean. This guide will teach you that.This guide will cover everything from which drain snake to use to proper usage on all different types of drains: sink, shower, tub, toilet, etc. What a Drain Snake Is and How It Works A drain snake is also known as a hand auger, drum auger, or plumber’s snake. A drain snake is a long, flexible wire rope in a drum or handle. At the end of the wire rope, there is a spring or an auger tip for drilling through a clog or gripping a clog in a drain.Putting a wire rope into a clogged drain and turning the handle makes the wire rope advance forward in the drain and rotate. Thus, a wire rope in a drain snake does two things: advancing forward in the drain and drilling through a clog in the drain. Rotation, not pushing, is what makes a drain snake work. Key Insight: A professional plumber uses a drain snake as a first option instead of chemicals for a clogged drain. A hand snake for $20 is just as effective as a professional plumber uses for a standard household clogged drain. The only differences are the length of wire and whether it has a motor or not. A basic hand snake is all you need for sinks, tubs, and showers. Choosing the Right Snake for Your Drain The wrong type of snake for a drain is a waste of your time. Here is the right one to use for the right situation: Hand Snake (Drum Auger) – Best for Most Household Drains This is the one you want for your bathroom sinks, kitchen sinks, shower drains, and bathtub drains. A 25-foot hand snake is the one you want for your standard household drain. This will allow you to reach any clog in your drain. The Cobra 00412 is the one I have and recommend. This is a very durable snake, and it is easy to use. The drum style ensures that the snake cable is always in your control as it is fed down into your drain. Toilet Auger – For Toilets Only Toilet Augers have a short, stiff snake cable covered in a protective rubber sleeve. They are designed so that your toilet bowl is not scratched. You do not want to use a hand snake for your toilet drain. The snake cable will scratch and damage your toilet bowl. If you have a toilet clog and a plunger does not work, a toilet auger is the one you want. They cost between $20 and $40. Power Snake – For Stubborn or Deep Clogs A power snake is used in combination with a regular cordless drill set. It will rotate the cable on its own. This is important if clogs are further down in your piping system. More aggressive than a hand snake. Try using a hand snake first. If you still have trouble, then it is time to use a power snake. 💡 Pro Tip: Buy a hand snake before you need it. Having a $25 Cobra hand snake in your utility closet will save you a ton of money in emergency plumber charges. It will have paid for itself the first time you use it to clear a clog at 10 pm on a Sunday morning instead of calling a plumber. What You’ll Need ⦁ Drain snake (hand auger) — $20 to $35 from Home Depot. 25 feet is best for home use.⦁ Rubber gloves — essential. Whatever is in the drain is not going to be pretty.⦁ Towels or rags — old ones to put around the drain area before you start⦁ Bucket — to put the removed clog material into⦁ Flashlight — handy for looking into the drain before inserting the snake⦁ Hot water — to flush the drain after removing the clog⦁ Dish soap — a squirt of soap helps flush the drain after the snake is finished Step 1: Prepare the Drain A few minutes of preparation will make the whole process cleaner and easier. 💡 Pro Tip: Now is a good time to give your drain stopper a good cleaning. Hair and scum buildup on your stopper will cause a clog right in front of your drain. A clean stopper and a clean drain will allow for better water flow than trying to snake your drain by itself. Step 2: Feed the Snake Into the Drain This is where technique comes in. Here, the idea is not to shove the cable in as fast as you can, but to guide it smoothly and steadily. ⚠️ Important: If you experience a strong resistance right after inserting the snake, especially within the first 2 or 3 inches, it is possible that the clog is located near the drain opening or

door not closing properly due to misalignment
Explore Projects

How to Fix a Door That Won’t Close (Sticking, Misaligned, or Warped)

A door that won’t close properly is one of those things that’s both completely insignificant and somewhat annoying at the same time. It’s not a problem. Everything’s perfectly fine. It’s just that every time you use that door, several times a day, it’s going to remind you that it’s not working properly.The door to my bedroom in my childhood home stuck during the summer. You had to push it shut with your shoulder to get it to close. And once it was closed, it opened on its own in dry weather. My dad just lived with it. I decided to take a look at it myself, and it only took 20 minutes of sanding to fix it.There are four possible causes of door troubles: swollen wood, loose hinges, misaligned strike plates, and warped doors. The first three are simple repairs. The fourth one’s a bit more complicated but still well within the capability of a beginner.This is a how-to article on how to figure out what’s wrong with your door and fix it. Why Doors Stop Closing Properly A door is a piece of wood that fits precisely in a door frame, and both the door and the door frame are in a constant state of adjustment in response to changes in temperature and humidity, settlement of the house, and wear and tear. Any of these conditions can cause a door to be out of alignment in its frame. The key to the solution is in understanding the problem. Sanding a door that is actually sagging out of alignment in its frame because of a loose hinge is a waste of time and can make the situation worse. Understanding the problem correctly from the very beginning is the most critical part. 🔑 Key Insight: Seasonal door problems, or doors that stick in the summer and work fine in the winter, are caused by wood expanding in humid weather. Wood expands up to 1/4 inch in width in high humidity conditions. This is a normal wood behavior and not a defect in the door. What You’ll Need ⦁ Screwdriver (Phillips and flathead) – for tightening hinge screws⦁ Longer screws (3-inch wood screws) – for fixing stripped hinge holes. $3-5 from Home Depot⦁ Wood toothpicks and wood glue – for filling stripped screw holes. $2-3⦁ Sandpaper (80-grit and 120-grit) – for sanding swollen door edges⦁ Hand plane – for removing more material from a swollen door⦁ Pencil or chalk – for marking exactly where the door is sticking⦁ Chisel and hammer – for adjusting the strike plate mortise⦁ Carton cardboard – for shimming sagging hinges⦁ Paint or sealer – for sealing the sanded edge after fixing to prevent future swelling 💡 Pro Tip: Before going out and spending money on tools, try the simplest fix first: tightening your door hinges. It takes 2 minutes and a screwdriver you likely already own, and it solves a surprising number of door issues entirely on its own. Step 1: Diagnose the Problem Open and close the door slowly while watching and feeling exactly where it binds, rubs, or fails to latch. The location tells you the cause. Where is the door sticking or rubbing? ⦁ Sticks in top corner on latch side – almost always a loose top hinge. The door sags away from top hinge side, and top corner will always swing toward frame on opposite side.⦁ Sticks along entire latch edge – swollen wood from humidity, or door has moved in its frame.⦁ Rubs along entire bottom edge – house has settled and door frame is no longer square, or door has swollen on the bottom.⦁ Latch does not reach strike plate – strike plate is not aligned. Latch bolt is hitting wrong spot.⦁ Door bounces open, will not stay closed – latch bolt is hitting above or below strike plate hole. The lipstick test for strike plate misalignment You put a little lipstick, lip balm, or chalk on the latch bolt. Push the door shut as far as it will close. Now, you open the door and look at the mark left on the strike plate. This will tell you exactly where the latch bolt is striking and entering the hole. This will give you precise information regarding the strike plate. The Hinge Gap Test You look at the space between all four sides of the door, or as close as it will get. There should be an equal space all the way around the door, 1/8 inch all the way around. If the space varies, then you will know which way the door has moved. If the space is wide at the top on the hinge side and small at the bottom, then you know the top hinge is loose and the door sags. Fix 1: Tighten Loose Hinge Screws This is always the first thing to try. It is free, takes 2 minutes, and solves a large percentage of sticking door problems. Hinges have screws that over time come loose due to the constant stress of opening and closing the door. Even a little loose, the door sags and sticks. Fixing Stripped Hinge Screw Holes A stripped screw hole is one where the screw only rotates without biting into the wood. It is common when the screw has been driven home many times. The fibers are compressed. 💡 Pro Tip: For the top hinge, which sees the most stress, replace the short hinge screws with 3-inch wood screws that go all the way through the door frame and into the framing members behind the door frame. This one modification makes the hinge much stronger and prevents future door sag. Cost: $3. Time: 5 minutes. Fix 2: Adjust or Reposition the Strike Plate If the latch bolt is striking the strike plate in the wrong position, i.e., above, below, or off to one side of the hole, it is possible that the strike plate needs to be moved to correspond to the position in which the latch bolt is striking

circuit breaker in tripped position inside electrical panel
Explore Projects

What to Do When Your Circuit Breaker Keeps Tripping (5 Causes + Fixes)

A tripping circuit breaker is the electrical system in your home doing exactly what it was designed to do: protect you and your home from something going wrong. The issue here is that most people will simply reset the breaker and hope nothing else goes wrong again. Well, that’s like putting tape over the check engine light in your car.I had a problem in my home where my circuit breaker would trip every time I would use my microwave and coffee maker at the same time. For weeks, I simply reset the breaker and continued on my merry way. Finally, however, I decided to look into the issue and figure out why it was happening in the first place. Once I learned about circuits, the solution was obvious and free.A tripping circuit breaker is always signaling you something. There are 5 possible reasons why a circuit breaker keeps tripping, and we’re going to go over each of them so you can understand exactly which one you’re dealing with and what you can do next.This is not a guide about how to bypass or disable a tripping circuit breaker. That’s not safe, and we’re not going to do that. How a Circuit Breaker Works — The Simple Version You will see a row of breakers in your electrical panel, and each of these will control one of the electrical circuits in your home. Each of these will be able to sense how much electrical current is flowing through that particular circuit. If too much electrical current is flowing through a circuit, and this is more than the breaker can handle (usually 15 or 20 amps), then it will switch into the ‘off’ position, thereby disconnecting the electrical power from that particular circuit.This is not a malfunction; it is a safety feature designed to prevent the wires in your home from overheating and causing an electrical fire. A breaker that trips is functioning correctly. A malfunctioning breaker is one that does not trip regardless of anything you plug into it.What you want to know is not ‘How do I make this breaker stop tripping?’ but ‘Why is this breaker tripping?’ Key Insight: Electrical failures and malfunctions are the second leading cause of home fires in the US, as revealed by the National Fire Protection Association. Circuit breakers are the first line of defense in the prevention of electrical failures from causing fires. Bypassing or taping a circuit breaker or replacing it with a higher-rated one can never be an option in the prevention of tripping. How to Safely Reset a Tripped Breaker However, before you are able to diagnose the problem, you have to reset the breaker correctly. Most people do not reset the breaker correctly. They only put the breaker back into the ON position without resetting the mechanism inside the breaker. Safety Warning: It is important that you never stand directly in front of the open panel door when resetting a breaker. It is important that you stand off to the side and look away from the breaker as you flip it. If an arc flash were to occur, which is a discharge of electrical energy caused by a fault, you don’t want your face in front of the panel. Cause 1: Overloaded Circuit (Most Common) The most common cause of a tripping breaker is an overloaded circuit. This is also the easiest problem to solve. An overloaded circuit refers to a circuit whose total combined demand for power by all the devices connected to a specific circuit exceeds the rated capacity of the circuit breaker.The power consumption capacity for a 15-amp household circuit is 1,800 watts for continuous power consumption. A 20-amp circuit has a power consumption capacity of 2,400 watts. If you have a running microwave (1,200 watts), a running coffee maker (800 watts), and a running toaster (900 watts) all at the same time connected to the same circuit, then you are consuming 2,900 watts of power while the circuit can only handle 1,800 watts. How to Identify It ⦁ The circuit trips only when many devices are running at the same time⦁ The circuit serves an area with many appliances⦁ The circuit trips after a few minutes of running the devices and not immediately after they are turned on⦁ Resetting the circuit works as long as you unplug some devices How to Fix It 💡 Pro Tip: Every room in your house likely has more than one circuits. Different outlets might be on different breakers in the same room. A plug-in outlet tester can be purchased at Home Depot for $10 to determine which outlets are on which circuits. Cause 2: Short Circuit Short circuit is a more critical problem than an overload. It happens when a live wire, which is of black color, touches a neutral wire, which is of white color, directly. It may happen inside an appliance, inside an outlet, or in the wiring system. This causes a huge surge of current, which immediately triggers a breaker. How to Identify It ⦁ The breaker will trip right away if you reset it, not after a few minutes of usage⦁ You might have heard a pop, seen a flash of light, and/or smelled burning when it first tripped⦁ A certain appliance always makes it trip whenever it is plugged in⦁ The breaker is warm or hot to the touch How to Fix It Safety Warning: If a burning smell or scorch marks are found on an outlet, switch, or appliance cord, it means that a short circuit has caused damage to that device due to excessive heat generated. It should not be used again without proper repair. If scorch marks are found on an appliance or switch, it means that it can cause a fire. Cause 3: Ground Fault A ground fault is like a short circuit; however, it occurs when a current leaks away from a hot wire to a ground wire or a grounded surface that can be a metal pipe,

cleaning bathtub surface before applying new caulk
Explore Projects

How to Caulk a Bathtub: Get a Clean Professional Finish Every Time

There are only two types of caulk jobs in this world: those that look as though they were performed by a professional, and those that look as though they were performed by a lunatic using a tube of toothpaste and a blindfold. I was firmly in the second group.My first attempt at touching up a caulk job on a bathtub was a disaster: a lumpy, uneven caulk line that smeared itself across the bathtub tiles and looked worse than the old cracked caulk I’d removed in the first place. It took me three tries and a great deal of frustration before I learned what it takes to make a good caulk line. And it’s not skill, it’s technique.What makes a caulk line look as though it was performed by a professional is four things: cleaning away all of the old caulk, making sure the surface is bone dry, caulking at a constant angle and speed, and smoothing it out in one motion. None of these things requires special skills, just knowledge of the technique beforehand. Why Caulk Fails and Why It Matters One of the hardest-working caulk seals in your home is the caulk seal around the bathtub or the shower. It is under constant assault from water, soap scum, temperature extremes, and the slight movement of the bathtub due to the weight of water being added to the tub. Most caulk seals have a useful life of 5 to 10 years before they start to crack, peel, or mold.If the caulk seal fails, water enters the area behind the tiles and into the wall cavity. At this point, the drywall begins to rot, mold starts to grow inside the wall, and the tiles start to come loose and fall off the wall. A $10 caulk seal job now becomes a $1,000 tile and drywall replacement job.Replacing the caulk seal around the bathtub every 5 to 7 years is basic home maintenance. It only costs you $10 in materials and an afternoon of your time. It protects thousands of dollars of tile work, drywall, and framing from water damage. Key Insight: Home repairs due to mold are among the costliest repairs a homeowner may encounter. Such repairs may cost anywhere from $2,000 to $10,000. The vast majority of mold growths in the bathroom start with a failed seal of caulk. Ten dollars of caulk is real money protection. Choosing the Right Caulk Walk into Home Depot and you’ll find an entire wall of caulk tubes. The right choice for a bathtub is simpler than it looks. For Bathtubs and Showers — Use 100% Silicone or Siliconized Latex Pure silicone caulk is the most waterproof and lasts the longest in continuous wet environments. It does not shrink, crack, or develop mold as other caulks do. Drawback: It cannot be painted and is slightly more difficult to smooth out compared to latex-based caulks. Siliconized Latex Caulk, also called ‘Latex Plus Silicone,’ is another type of caulk that is more flexible and mold-resistant compared to latex caulk, easier to apply compared to pure silicone caulk, and can be painted. It is the type of caulk I personally use for my bathtub projects and would recommend for beginners too. What to Avoid White plain latex caulk is only for trim work and baseboards. Latex-based caulk shrinks as it dries and cracks easily in wet environments. Do not use it in your bathtub. Avoid ‘paintable only’ and ‘interior use only’ caulks in wet environments. Pro Tip: If you want a quality caulk for your project, look for a caulk tube that says ‘Kitchen and Bath’ or ‘Tub and Tile’ on it. These caulks are designed for use in wet environments and contain mold inhibitors. GE Silicone II Kitchen and Bath and DAP Kwik Seal Plus caulks are excellent caulks available at Home Depot for $6-10. What You’ll Need — Tools and Materials ⦁ Caulk gun – costs $6-12 at Home Depot. Any basic ratchet action gun is sufficient. The cheap squeezable ones do not allow control of caulk flow.⦁ Caulk – 100% silicone or siliconized latex, kitchen and bath. One tube will caulk a full bathtub.⦁ Caulk remover tool – a plastic scraper with angled blades.⦁ Utility knife or razor blade – for scoring and removing old caulk.⦁ Painter’s tape – the magic solution for straight lines.⦁ Isopropyl alcohol (rubbing alcohol) – for cleaning the surface before caulking.⦁ Paper towels or clean rags – lots of these.⦁ Plastic spoon or caulk smoothing tool – for smoothing out the bead.⦁ Hair dryer (optional) – for drying the surface – a humid bathroom is no fun. Pro Tip: Pick up a caulk smoothing tool kit – they’re around $5-$8 at Home Depot and come with a bunch of different sizes for different widths of caulk joints. The curved edge will produce a much better finish than using your finger, especially for newbies who haven’t yet developed the touch for it. Step 1: Remove All the Old Caulk This is the most important step and the one most people make a mistake in. New caulk applied over old caulk never bonds correctly and will peel within months. Old caulk residue must come out entirely before new caulk is applied. Important: If black mold is growing under the caulk, where the tub meets the tile, do not caulk over the black mold. Clean out the black mold growth using a bleach solution (1 part bleach to 10 parts water) and let it dry 24 hours before re-caulking. Caulking over black mold growth only makes the black mold worse. Key Insight: Using a caulk remover chemical like Dap Caulk-Be-Gone is a great time-saver when trying to remove caulk that is very hard to remove. Simply spray the chemical onto the caulk, wait 2 hours, and the caulk peels right off. The cost of the chemical is $6 at Home Depot. It is well worth the cost when you are trying to remove caulk. Step 2: Clean and Dry the

how to replace a light switch step by step DIY thumbnail
Explore Projects

How to Replace a Light Switch (Your First Electrical DIY) — Step-by-Step

However, electrical work can also be intimidating. I know that. There is something psychologically daunting about wiring and electricity. It is as if it is a trigger that makes a person want to pick up the phone and call an electrician before even trying to look at the problem.Changing a standard light switch was my first electrical work project. It was a nervous task for me, yes. However, once I had turned off the power to the switch, used a voltage tester to ensure that the power was off, and removed the old switch, I saw that all I had to do was remove two wires connected to one switch and connect them to another. That is really all there is to replacing a standard single-pole light switch. From identifying what type of switch you have, to correctly wiring it up, this guide will walk you through each step with all safety precautions included. With this guide, you’ll be able to replace your first switch, and from there, you’ll be ready to take on more electrical projects in the future. Understanding Light Switch Types Before buying a replacement switch, you need to know what type you have. Using the wrong type means the switch either won’t work or won’t fit the existing wiring. Single Pole Switch — Most Common Two brass screws on the sides, or two wire holes in the back. Controls one light or fixture from one location only. Has ON and OFF printed on the toggle. This is the simple switch you will commonly see in most bedrooms, living rooms, and hallways. This is what this article is all about. 3-Way Switch Three screws: one is black and dead, and the other two are brass. Used if you want to control one light from two different places. Like a light switch in a hallway, you’ll want to control it from each end of the hall. A little more complex to wire. If you have an old switch with three wires attached (not including the grounding wire), you have a 3-way switch. Dimmer Switch Replaces regular switches and provides the ability to control the intensity of the lights. Can only be used with certain kinds of light bulbs. Most dimmer switches that control LED bulbs are rated for LED, CFL, and incandescent bulbs. Be sure to check the bulb compatibility before making a purchase. The installation is the same as the single-pole switch. GFCI Switch Includes test and reset buttons. Must be installed in the bathroom, kitchen, garage, and outdoors. Will interrupt power supply instantly in case of a ground fault detection. Key Insight: We are replacing a basic “single pole” switch for this guide, and this is probably the most common switch in any home. If you take your old switch out and notice that three wires are connected to it, excluding the bare copper wire for grounding, you probably have a “3-way switch.” The steps are quite similar, but the connections are different. Be sure you know what you are replacing before you get your new switch. What You’ll Need — Tools and Materials Tools ⦁ Flathead Screwdriver: This will be used to remove the faceplate screw, as well as switch screws.⦁ Phillips Head Screwdriver: This will be used for most switch screws, as they are Phillips Head.⦁ Non-Contact Voltage Tester: This is the most important tool for this project.⦁ Cost: $15 to $20 from Home Depot.⦁ Needle-Nose Pliers: This will be used to bend the ends of wires into hooks.⦁ Wire Stripper: This will be used if the ends of wires require new stripping.⦁ Electrical Tape: This will be used for any exposed wire connections. Materials ⦁ Replacement light switch — the amperage must be the same as the old one; 15-amp is standard for most homes.⦁ Replacement faceplate (optional) — if the old one is cracked, yellowed, or of a different color.⦁ Wire nuts (optional) — if you might need to connect wires Safety Warning: The first thing you need to do is go out and buy a non-contact voltage tester. This is the single most important safety device you will ever need to buy if you want to do electrical work. It is the only way to tell if a wire is dead or alive without touching it. Don’t rely on the breaker. It will cost you $15–20. Step 1: Turn Off the Power at the Breaker Go to your electrical panel. The electrical panel is usually found in the basement, utility room, garage, or hallway. Find the breaker that controls the room where the switch is. Switch it off.If the breakers have no labels, you can use the trial and error method. Switch one of the breakers and see if the light connected to the switch is off. Continue doing this until you find the right one. Don’t forget to label it because it will help you later in the repairs too.Once you have switched the breaker, check the switch. The light connected to it must not turn on. If it turns on, it means you have chosen the wrong switch. Pro Tip: It might be a good idea to take a picture of your electrical panel before you begin, especially if your breakers are not labeled. It will come in handy for all your future electrical endeavors. Safety Warning: NEVER work on a switch when the power is on. There are NO EXCEPTIONS to this rule. You can get a very nasty electrical shock from a standard household 120V electrical circuit. Be sure to switch off the circuit breaker to your switch box, then check with your voltage tester as described in Step 2. Step 2: Verify the Power Is Off This is where safe electrical work ends, and bad electrical work begins. Breakers can be easily mislabeled. Switches can be easily on shared circuits. Don’t ever assume anything. Key Insight: The non-contact voltage tester works based on wire insulation. You do not need to touch the wire to test

how to fix squeaky floors DIY guide thumbnail
Explore Projects

5 Common Fixes for Squeaky Floors: Pros and Cons

There is a certain level of frustration that is associated with a squeaky floor. However, the squeaky floor is not a crisis. It is not damaging in the least. However, with each time you walk on that part of the floor, especially when you are walking around the house in the middle of the night, it is as though the floor is announcing your presence to the rest of the people in the house. I had a squeaky floor in the house that I used to stay in. The squeaky floor was quite embarrassing, especially when I had people visit me. However, I was curious about what was happening with the squeaky floor. After finding out what was happening with the squeaky floor, I found that it was quite easy to fix the squeaky floor. Ten minutes and some talcum powder from the kitchen later, the squeaky floor was fixed. The vast majority of squeaky floors are due to wood on wood, whether it is the floorboards, a loose nail, or the subfloor separating from the joist underneath. Knowing what the problem is, the solution is quick, easy, and inexpensive, and it will last forever. The guide below will give you 5 solutions for how to fix a squeaky floor, and I will give you the good, bad, and ugly so that you know the difference between a solution and a quick fix. Why Floors Squeak — The Real Cause The squeak results from the rubbing of two pieces of wood, along with the application and release of pressure. The friction between the two pieces of wood results in the squeaking sound. Knowing the two pieces of wood that are rubbing against each other would lead to the determination of the solution to fix the squeak.The three major causes of squeaks on the floor of an average house: Key Insight: Squeaks that occur only during winter months and disappear during summer are usually caused by wood shrinkage in dry and cold air, creating minute gaps. These are ideal for lubrication solutions. Squeaks that occur all the time are more structural in nature and require a physical solution, such as the use of nails or screws. What You’ll Need You won’t need everything on this list — it depends on your floor type and which method applies. Read through the methods first and then gather what you need. Pro Tip: Before you go out and spend money on anything, you can try the talcum powder solution, which will cost you almost nothing and will work surprisingly well on many squeaks that can be solved in this way. Only resort to the more complicated solutions if the talcum powder solution doesn’t work. Step 1: Locate and Identify the Squeak Walk slowly over the squeaky area and pay attention to where it is loudest. Mark it with a piece of tape for easy location later. This may sound obvious, but it is surprisingly hard to determine where a squeak is, due to the nature of sound traveling through the floor and appearing to emanate from a greater area than it really is. Is it a surface squeak or a subfloor squeak? Put yourself down on the floor and press down hard with your hand on the squeaky spot while another person walks across the floor. If the squeak goes away, it is a rubbing of the boards, and it can be repaired from the surface. If it doesn’t, it is something that is happening below the surface, in the subfloor or joist area. Do you have access from below? If you have access from below, such as in the case of a basement directly below the area with the squeaky floor, you have the best and easiest solution to your problem. Have someone walk across the area with the squeaky floor while you observe from below. In many cases, you can see exactly what is happening. Pro Tip: Go ahead and shine a flashlight from underneath and watch the subfloor as a person walks on top of it. If you can see the subfloor moving or flexing in a certain spot, that’s where you want to focus. Take mental note of that spot, and you can even mark it with some chalk to point it out when you’re ready to address it. Method 1: Talcum Powder or Graphite (Quickest Fix) This is where I start every time, and it works more often than you think, especially on old hardwood floors where the wood is rubbing against other wood.Sprinkle talcum powder (baby powder) or powdered graphite over the area where the squeak is happening on the floor. Using a stiff brush, an old toothbrush, or your fingers, rub the powder into the cracks between the floorboards. Stomp back and forth over the area several times to get it worked in as deep as possible.Wipe off the extra powder with a damp cloth. Stomp back and forth over the area again to test it. What it fixes: rubbing of boards against each other. It lubricates the area where the boards meet and reduces friction.What it doesn’t fix: loose nails, movement of the subfloor, or structural issues. The powder will wear off over time if the issue is movement as opposed to friction.How long it will last: months to years depending on the issue. Some floors will be fixed permanently by this solution. Others will need to be reapplied on a yearly basis. Pro Tip: Powdered graphite, which is often used for lubricating locks, is even more effective than talcum powder in eliminating squeaky noises, since it is a dry lubricant and will penetrate more deeply. It is available in the hardware section of Home Depot for about $3. Method 2: Drive Finish Nails at an Angle If the powder method didn’t solve it, the squeak is likely coming from a loose nail or a board that needs to be secured more firmly to the subfloor beneath it. Driving finish nails at opposing angles —

DIY toilet repair plumbing guide
Explore Projects

3 Simple Fixes for Your Running Toilet in Less Than 20 Minutes

A running toilet is one of those problems that exists in the background. It does not make a big noise. It does not cause any visible damage. It is one of those things that you get used to—the sound of a low hissing noise coming from the bathroom. I have lived with a running toilet for almost two months now. I just looked at my water bill, and I could not believe the numbers. I was being charged extra for 200 gallons of water every day due to one toilet that would not stop running. The part I needed only cost me $6. It only took me 15 minutes to fix the toilet. The water bill ended the very next month. If you have a running toilet, it is nearly always one of three things: a bad flapper, a bad fill valve, or a float that is set at the wrong height. All three are very simple fixes. All three can be fixed for under $15. And none of these fixes require a plumber. In this article, we will show you how to determine which of these three things is wrong with your running toilet. Then, we will show you how to fix that thing. It will take us 20 minutes, and it will take you 20 minutes as well. Why a Running Toilet Is a Bigger Problem Than It Sounds For most people, a running toilet is not a big deal. The issue is that it is costing you money on your bill without your knowledge. A running toilet wastes 200 gallons of water every day. A toilet that is running quickly, or a toilet that is running quickly enough that you can hear a stream of water coming from it, is wasting up to 4,000 gallons of water every day. This is costing you between $70 and over $500 on your bill. The solution to a running toilet is always inexpensive and quick. The longer you wait, the more you are wasting. Key Insight: “Toilet leaks are one of the most common and costly types of water waste,” states the EPA’s WaterSense program. “A running toilet can waste over 73,000 gallons of water in one year, or the equivalent of a filled swimming pool.” Understanding the Inside of Your Toilet Tank Before you touch anything, remove the lid from your toilet tank. Toilet tank lids are made of ceramic and are easily broken. Open the tank. Inside the tank, you will see three main things. They control everything. The Flapper The rubber disc is at the bottom of the tank. This disc covers a hole in the tank called the flush valve seat. When you flush the toilet, the flapper opens, and water rushes into the bowl. When you are refilling, the flapper closes, keeping the water in the bowl. If you have an old, warped flapper that does not close completely, you will have running water into the bowl. The Fill Valve The tall cylindrical device on the left side of the tank. Its purpose is to refill the tank with fresh water after each flush and turn off automatically when the water level is correct. A worn-out fill valve does not turn off. Instead, it continues to supply water to the tank, overflowing to the overflow tube and draining continuously. The Float The device that tells the fill valve when to stop filling the tank. In older toilets, it is a ball on the end of a long rod (ball float). In newer toilets, it is a cup or cylinder that moves up and down on the fill valve rod (cup float). If the float is set too high, the water level is above the overflow tube and drains continuously. If the float is damaged, it does not send any signal to the fill valve to turn off. Pro Tip: First, take a quick look without the tank lid. See what’s going on. Do you see water trickling into the bowl before you even flush the toilet? That’s your flapper. Do you see water trickling into the overflow tube? That’s your float or fill valve. This step alone can get you focused on the problem in 30 seconds or less. What You’ll Need — Tools and Materials You likely won’t need all of these — it depends on which component is faulty. Buy only what you need after completing the diagnosis in Step 1. Tools Materials Pro Tip: Fluidmaster 400A is the toilet repair industry standard. It works on 95% of all toilets, installs in less than 10 minutes, and has a 5-year warranty. It has been the plumber’s and DIYer’s first choice for decades. And at $10-$12 on the Home Depot shelves, it’s the one I always recommend. Step 1: Diagnose the Cause Don’t guess — diagnose. Each of the three causes has a specific test. Run through these in order, and you’ll know exactly what to fix before buying any parts. Test 1 — The Food Coloring Test (for flapper leaks) 5-6 food coloring drops are to be added to the tank. The toilet should not be flushed. After 15-20 minutes, check the toilet bowl. If you see water with food coloring, then it means the flapper is leaking. 💡 Pro Tip: No food coloring? You can use a couple of drops of dark liquid, coffee, soy sauce, or even a little dirt. Just anything that visibly colors the water. Test 2 — The Overflow Tube Check (for float/fill valve issues) If the tank lid was removed, check the overflow tube, which is a tall open tube in the center of the tank. If you see water running or trickling into the top of the tube, then your float is too high, or your fill valve is not shutting off correctly. The water level should be 1 inch below the top of the overflow tube. If the water level is at or above the top of the tube, you need to adjust your

Scroll to Top